Ok, so by now, you have registered your website name and downloaded WordPress. Now, I want to show you how to install a premium WordPress theme, because this will give you the biggest long term benefit to your blog. The theme I will show you how to install is the Genesis Theme, which is very popular and used by a LOT of bloggers. Premium themes cost a little bit of money but after get it, you won't have to invest in anything else for your website for a very long time. If you don't yet have a website, first read my post, Step by Step How to Make a WordPress Website and do that first. Then come back here and read this.
Why Use a Premium WordPress Theme?
They call them premium WordPress themes because you get more with them than you do with free WordPress themes. For example free themes may not be updated regularly ―if at all. As WordPress gets updated, it's possible that a free theme may not with WordPress one day. That means your website may not work! If that's the case, all your hard work was for nothing. Free themes that are not updated may also be vulnerable to attack by hackers.
Premium WordPress themes get updated regularly ―the Genesis updates are free for life too―so you are always ahead of the curve. Premium themes also make it easier to do stuff. For example, with a premium theme like Genesis, you can change the number of columns your website has ―and even the font and color of the font also – with just a click of a button!
If your just starting out as a blogger, you may not use all the benefits of the Genesis theme right away ―and that's OK. Eventually you will learn more as your blogging skills grow, and when you do, that is when it's good to have a premium theme. It will be there when you need it, making your life easier.
Why The Genesis Theme?
If you remember from my how to install WordPress post, I mentioned that I use a premium WordPress theme called the Thesis Theme. It's great and I like it a lot but, I think Genesis will be easier to set up ―especially if you want your blog to look “pretty” almost immediately. Both Thesis and Genesis are highly regarded so either that you choose will make you happy for years to come.
The site you are on right now (Joe-Cannon.com ) is a Thesis blog that had some work done to it. I didn't know how to do that work, so I paid people to adjust Thesis for me. With Genesis, you won't have to pay anybody. You'll be able to do it all yourself with just a few clicks.
As more people surf the web on phones, iPads, tablets, etc. you need a theme that responds to these different devices. The Genesis theme is a responsive theme, which means that it knows when people come to your website via an iPod etc. and adjusts so that those people can have an enjoyable visit. Same is true for phones too.
Genesis Theme / Genesis Framework
Before we get started, I want to point out that the Genesis theme is really called the Genesis Framework. Think of the framework like the transmission of a car. It's what's under the hood. It's the framework that is the “brains” of your website. Most of us use the terms Genesis theme and Genesis framework to mean the same thing. I just wanted to point this out in case it confused you.
When it comes to the Genesis theme, people have an option. They can:
- just get the Genesis Framework alone
or
- get the Genesis Framework and a Genesis Child theme (recommended)
Think of the child theme as what goes over the transmission. It's the outer shell. For example, a Honda Civic and Honda Accord both have Honda transmissions, but both cars look different. That's like what a child theme is. A Genesis child theme makes your website look different on the outside.
There are a LOT of genesis child themes. To see them all, go to the Genesis website and at click on “shop for themes” to see them all.
How To Install The Genesis WordPress Theme
For this demo, I'm going to keep with the website I previously created, called Golf-Fitness-Answers.com. You will use your already-created WordPress website. If you have not registered a website name yet or installed WordPress, go back to my post, Step by Step, How To Make A WordPress Website and do that first.
To install the Genesis theme follow these steps.
First, go to StudioPress.com ―that's the company that makes the Genesis Theme.
Second, click on Shop for Themes. Decide which Genesis theme is right for you. Deciding which Genesis child theme is right for you is a personal choice. Each child theme will give you a lot of flexibility in what you can do.
Note. If you only wanted the Genesis Framework without any Child themes, you can do that too.
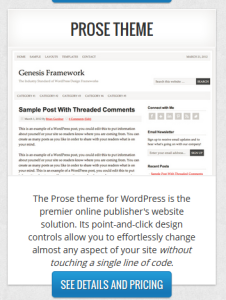
All the themes are arranged alphabetically. As you scroll through all the different Genesis child themes, notice that you can click on “See Details and Pricing” to learn more about the theme.
All child themes come with the Genesis Framework.
Also notice on the lower left is a link called “Theme Demo” where if you click that link, a window pops up showing you what the website could look like. Pick the child theme you like.
For this demo, I'm going to purchase and install the Prose Theme. I'm picking the Prose Theme because it doesn't stress my eyes to look at it (important for your readers!) and because it let's me change a LOT of things with just a click of a button. Any Genesis theme will work the same way though. They have many themes. pick the one that you like best.
Purchase The Genesis Prose Theme
When I click on Buy Theme + Framework, I'm taken to the Check Out Screen:
This is pretty straight forward. They even let you pay with Paypal if you like!
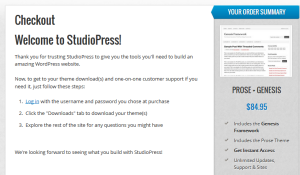
After you fill in your payment information you are greeted with the checkout screen:
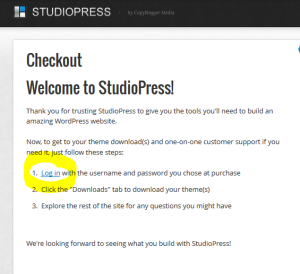
You will also get a couple of emails from StudioPress ―your receipt and a Welcome email as well. Notice in the picture that there is a log in hyperlink. I've circled it so you can see it better. You will also get an email with the steps needed to download the Genesis Framework and the child theme you've chosen.
Save The Genesis Theme To Your Desktop
Now let's log in and get the theme you picked. Click the log in link on your screen (or in the email that StudioPress sent you) and enter your username and password.
Your username is the email address you gave when you purchased Genesis. If you forgot your password, click “forgot password.”
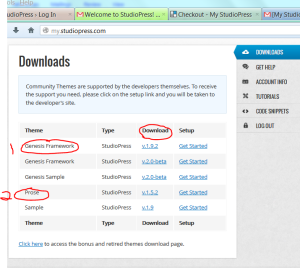
After you enter your username and password, you will be greeted with a screen that looks like this:
From this screen, you will download the Genesis Framework and the Prose theme (or whatever child theme you purchased). I've circled and numbered them to make it easier for you.
First, let's download the Genesis Framework and save it to the desktop. Click the version hyperlink under the Download column. If you are not sure how to do this, if you use windows, right click the link and then click “Save link As.” You can then save the file to your desktop.
Note. I have version 1.9.2 but your version may be different depending on when you purchased Genesis.
After you do this, the Genesis Framework will appear as a zip folder on your desktop.
Second. Save the Prose Theme to your desktop. Looking under the Download column, right click on the Prose Theme and click “Save Link As” I'm using version 1.5.2 in this demo. Your version may be different.
Now that you have saved the Genesis Framework at the Child theme to your desktop. Let's now install them onto your website.
How To install Genesis Theme On Your Website
Go to your WordPress website and log in. If you don't remember how to do this, just go to your browser (firefox, chrome etc.) and type : “website name/wp-admin” In the long window at the top of the screen.
For example, my website is Golf-Fitness-Answers.com, so I would type:
Golf-Fitness-Answers.com/wp-admin
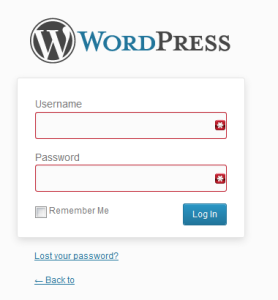
When you do this, you are greeted with this page:
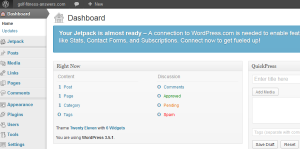
Now just enter your WordPress user name and password. This takes you to your WordPress Dashboard screen:
Installing the Genesis Framework and Child theme will be easy. We will be uploading the two files you saved to your desk top:
1. Genesis Framework
2. The child theme you picked (if you picked a child theme)
Let's upload and activate the Genesis Framework first:
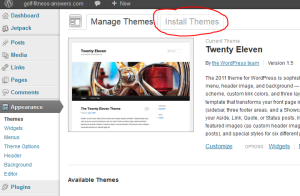
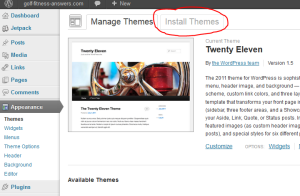
1. On the left side of your dashboard go to Appearance. Then click on Themes. Now you see this window:
Click the Install Themes tab (I've circled it to you can see it). Clicking the tab brings you to this window:
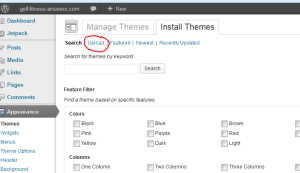
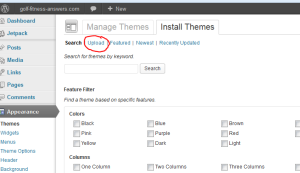
We will be uploading the Genesis Framework first, so click Upload (I've circled it). This takes you to this window :
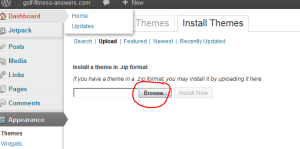
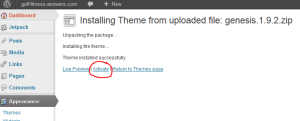
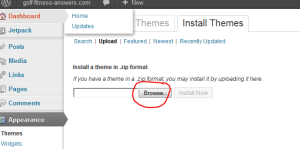
Click the Browse button and locate the Genesis Framework zip file on your desktop (or wherever you saved the file ) and click “Install Now.” After you do this you will see this screen telling you Genesis has been installed. Now click Activate.
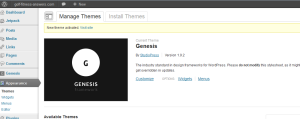
Activating the theme then pops up this window:
Now, we are going to install the Child theme just like before.
Go to Appearance and click the Install Themes tab:
Then click Upload:
Locate the Prose Theme (or the child theme you picked) using the Browse button
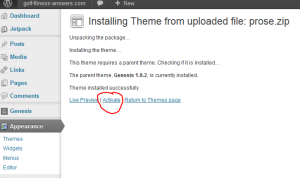
When you have found your Child Theme, click the Install Now button. You'll then see this screen:
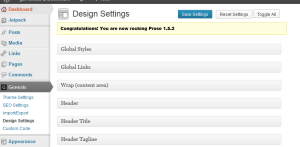
Click Activate and the Prose Theme will be installed. You now see a screen that looks like this:
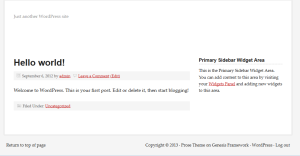
If you installed the Prose theme your website looks kind of like this:
We still need to configure the Genesis Theme to get it looking good (and of course add the content ―you can do that on your own later). Tweaking the Genesis theme to make it look pretty isn't hard and that's what we will do in the next post.
Click Genesis Theme Settings and we will continue…
What do you think?
Fantastic post! I found the step-by-step instructions and screenshots to be super helpful. I just made the big switch from WordPress.com to self-hosting this week. Thanks so much.
Thanks Paul I’m glad the tutorial helped you.
Thanks for this article. By the way, would it be okay if I start blogging with a free account and decide later on hosting the blog? Will the transition be easy enough to migrate from a free account to a paid one? Hope you could shed light on the query. Thank you.
Kelly you could do this if you like. I started with a free account myself. When I made the switch I left a link at the old site that directed people to my new website.
great post. I have a question regarding the difference between hosting and website building. I started a website with WIX however, it offers its own way to upgrade to having a personal domain name and such. What is the difference between upgrading, and having a host? Any clarification will be useful.
Hi John, while Ive heard of WIX, I’m not familiar with how they do things. I prefer WordPress because it’s free and is the most popular website platform on Earth.