So by now you have installed WordPress on your website and you have also purchased the Genesis Theme and installed it on to your website. Now, I want to show you how to configure the Genesis theme settings so that your website looks good. If you are not at this point yet, go back and read my post on how to make your website and how to install the Genesis theme that I recommend.
This post is a continuation on my series of posts to show you how to make your blogging website. For more information also see:
How to make your website step by step tutorial
How to install the Genesis WordPress Theme
Genesis Theme Design Settings Review
Tip. When you purchased the Genesis theme, you were also able to download free ebook Genesis For Beginners. If you don't already have it, go back to the studiopress.com and download it. That will give you additional information.
General Settings and Pages
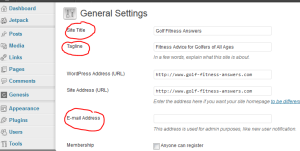
You may have already done this but if not, let's give your website a title. You do this by going to the Settings category and click on General. The window looks like this:
In the Site Title box, enter the name of your website. In my case, its “Golf Fitness Answers.” You may also want to enter a Tagline under it. If you didn't do that already, the tag line probably says “just another WordPress site.” Make the tag line descriptive of what your website is about. Your tagline should include some key words. For example, the tagline I'll use is “Fitness Advice for Golfers of All Ages.”
Be sure to click Save Changes at the bottom of the screen.
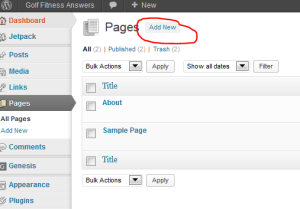
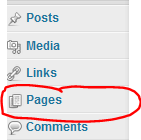
Next scroll up to “Pages.” These will be the different pages that appear in the navigation menus at the top of your website.
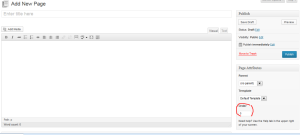
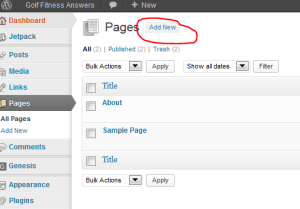
Click the Add New button to make a new page. When you do this you see a window like this:
Give your page a title and if you want to add content now go ahead (or do it later if you like). The “order” menu on the right lets you determine what page comes first, second etc. Reading from left to right, the lower the number you give it a page more to the left the page will appear. A page with number zero would be the most left. The highest number of the page, the more to the right it would appear.
I suggest you order your windows 10, 20, 30 etc. Leave some room between the numbers. This way if you want to go back and add a page between page 10 and 20 for example, you will be able to.
Right now, let's make these pages:
- About
- Contact
Genesis Theme Settings
Now let's adjust the Genesis Theme settings. There are a lot of them but they are not hard to tweak. Let's take the theme settings one at a time, starting with “Information.”
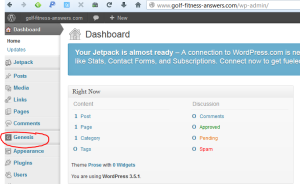
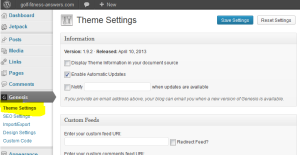
Open the website that you downloaded the Genesis theme on to. When you do you will see your dashboard and if you look on the left you will see “Genesis” listed in the menu:
Click on Genesis and you will see a little menu drop down like this:
Notice “Theme settings.” This is what we will tweak first. Let's take them one at a time starting with “information.”
Information
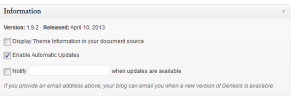
The screen looks like this:
Here, don't change anything. I recommend you DO NOT display theme information so don't check that box.
I recommend you keep the check mark in Enable Automatic Updates.
If you click the Notify box ―and enter your email ―you will be emailed when a new genesis update is available. Its up to you. You'll get an update notification also when you open WordPress.
Custom Feeds
Just below Information is Custom Feeds:
If you have a feed, with FeedBurner, everybody who signed up to your feed would be alerted when you post something new on your website. If you are just starting out with blogging, you probably do not have an RSS feed so this may not yet apply to you. If you want to get a feed, you can sign up for a free feed at FeedBurner.com. If you are new to blogging, I say don't worry about this.
Genesis Default Layout
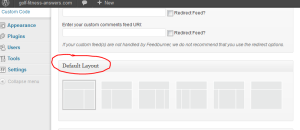
Scroll down a bit until you see Default Layout. It will look like this:
Here, you will decide what you want your overall website to look like. Do you want a vertical column on the right, on the left, on both right and left – or no vertical columns? I am going to choose the first option ―one vertical column on the right. You choose what you feel is best for you by clicking on the layout that you like best. If you click “Save settings” at the bottom of the screen, and then look at your website (refresh the site first) you will see, that your website will have the general look you selected.
Navigation Settings
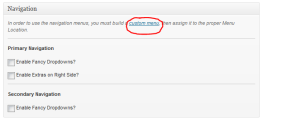
Scroll down a bit to Navigation. It looks like this:
Genesis gives you the option of having a Primary Navigation menu and a Secondary Navigation menu ―as well as the ability to have fancy drop down menus also . The Primary Navigation appears above the main heading of your site (above your website name). I think that's all you will need right now so let's create the Primary Navigation menu .
Remember those pages we created above? Now we are going to use them. If you didn't do it before, go to the “Pages” tab on the dashboard and make some pages that will be listed in your Primary Navigation.
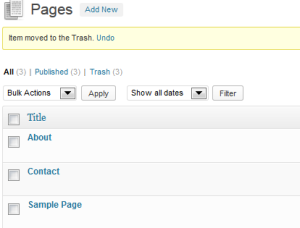
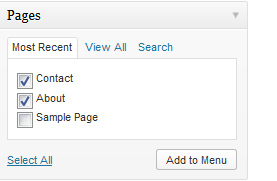
Click on Pages and you see this:
Click Add New and name this page “About” and then click “Publish.”
Click Add New again and name this page “Contact” and then click “Publish”
Repeat this process for any other pages you want to add to your Primary Navigation. You can always do this again later if want to add more pages.
Now, go to Genesis Theme Settings and go to Navigation. The window looks like this:
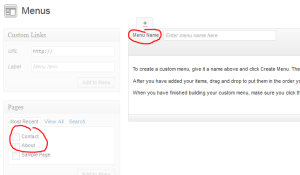
Click Custom Menu. You know see this window:
You can see the pages you created on the left. In the Menu Name box call this menu “Primary Menu” and then click “Create Menu.”
Now Click on the pages (About, Contact etc) you previously created and want to add to your Primary Menu. Then Click “Add to Menu.”
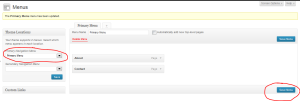
When you do this the pages appear in the Primary Menu area:
In the Theme Locations box, Click the down arrow and select Primary Menu. Then, Click Save Menu.
When you do this, all of the pages you selected to be in your Primary Menu will appear at the top of your website:
Remember to add content to your pages later.
Breadcrumbs
Now from the Genesis Theme settings, scroll down to Breadcrumbs:
Breadcrumbs help your website visitors find their way around your site so they don't get lost. If you activate breadcrumbs, there will be links at the top of each page to help people find out where on your website they are, and how to get back to where they want to be. You can activate them or not. It is up to you. I think it's a good idea to use them.
Comments and Trackbacks
Leave check marks where they are. I don't think you need to change anything here.
Content Archives
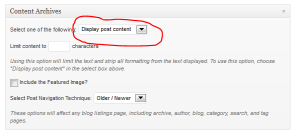
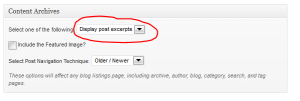
You can adjust how the older posts on your blog look to people
If Display post content is used, the entire blog post will be displayed. If Display post excerpts are selected, only a portion of each post is displayed. People then have to click on the post to see all of it. Decide which you want. You can always change this later if you like.
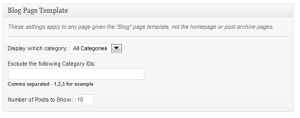
Blog Page Template
Leave All Categories selected. Don't change anything here.
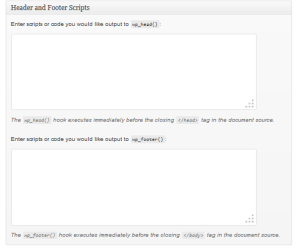
Header and Footer Scripts
You don't have to worry about the Header and Footer Scripts If you are just starting with blogging. These boxes let you add different codes in them like Google Analytics. This is one of those “it's there when you need it” perks of having a premium WordPress theme.
When you are done making the changes you like remember to click Save Settings at the bottom of the screen:
OK, you just made all of the Theme settings to the Genesis theme. Now let's address the Genesis Design Settings in this next post (click the link).
What do you think?



Joe, you left me hanging.
Taryn, how did I leave you hanging?